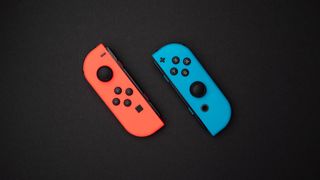
Nintendo Switch에서 Joy-Con 드리프트를 수정하는 방법이 궁금하십니까? 그런 다음 올바른 페이지에 도착했습니다. Nintendo Switch 는 사랑받는 콘솔이지만 Nintendo Switch와 그 형제인 Switch Lite 가 전 세계적으로 계속 매진되는 동안 한 가지 두려운 문제가 남아 있습니다. 바로 Joy-Con 드리프트입니다.
Joy-Con drift happens when the Joy-Con’s thumbstick detects movement, even when the player isn’t touching the Joy-Con. During gameplay, characters can wander off, mis-select items, and struggle to make precise moves. In more dramatic terms, Joy-Con drift makes your Switch feel possessed by an unseen hand. While Switch owners can purchase new Joy-Cons as a pricey solution, the Switch Lite, unfortunately, does not have detachable Joy-Cons.
Joy-Con drift is such a widespread issue that Nintendo’s president, Shuntaro Furakawa, made a rare move to apologize for its troubled products, and even addressed the ongoing US class-action lawsuit over drifting Joy-Cons.
Fortunately, we’re here to tell you how to fix Joy-Con drift at home. Do keep in mind that messing with the internal parts of your Switch can be risky, and can even void your warranty.
- Best Nintendo Switch games: the most essential Switch releases
- Best Nintendo Switch accessories 2020: make the most of your Switch
- Nintendo Switch 2: what we want to see from a Nintendo Switch Pro
Method 1: update your Joy-Cons
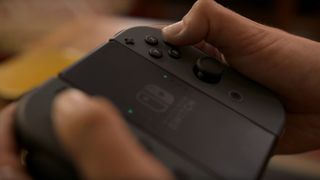
The first step in trying to fix Joy-Con drift is to update your Joy-Cons. With both Joy-Cons attached to the main console, head to ‘System Settings’. Select ‘Controllers and Sensors’, then ‘Update Controllers’, and press the A button. This should ensure that you have the latest Joy-Con firmware installed.
Method 2: recalibrate your Joy-Cons
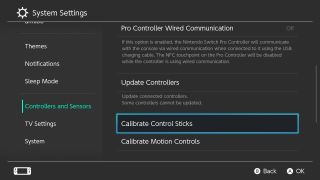
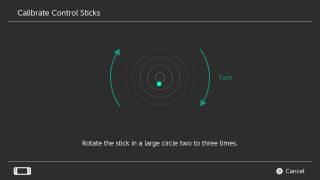
Detach your Joy-Cons from the main console and recalibrate them one at a time. First, head to ‘System Settings’. Select ‘Controllers and Sensors’, then ‘Calibrate Control Sticks’. This takes you to a series of simple tests, which can be a little sticky if your Joy-Con isn’t cooperating.
The first test requires you to check the responsiveness of a floating point in a reticle. The point should display as a ‘+’ when the thumbstick is not being touched. When you turn the thumbstick, the edge of the reticle’s circle should turn green. If the Joy-Con thumbstick isn’t performing correctly, press the X button to recalibrate the Joy-Con.
The next test involves a more detailed point and reticle. Push the stick toward the triangular arrow and release it when the triangle changes colour. You will have to perform this same task at all four cardinal points of the reticle to complete the test.
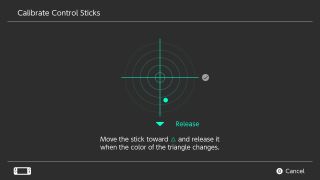
Next, rotate the thumbstick in a ‘large circle’ two to three times. Keep the floating point as close to the outermost edge of the circle as possible – a green line will appear to indicate that you’re doing it correctly, and disappear if the point strays too close to the center of the circle. This was particularly challenging for our ailing Joy-Con, so we had to apply a little more pressure (gently!) with both hands.
Method 3: clean the Joy-Con thumbstick
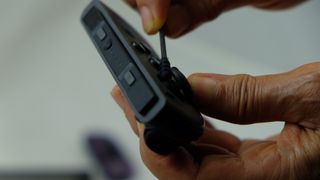
이것은 Joy-Con 드리프트를 고정하는 가장 간단하고 덜 침습적인 방법입니다. 전자 제품용 접점 클리너(또는 이소프로필 알코올), 면봉, 선택적으로 작은 핀셋 세트가 필요합니다.
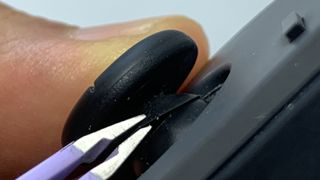
Joy-Con 썸스틱의 '머리' 바로 아래에 있는 작은 고무 덮개를 살펴보십시오. 여기에서 핀셋이 유용합니다. 먼지와 기타 입자가 내부 메커니즘에 들어가는 것을 방지하도록 설계된 작은 고무 '스커트'를 찾을 수 있습니다.
면봉 헤드에 접촉 클리너를 약간 뿌리고 부드럽지만 단단하게 면봉을 고무층 아래로 밀어 넣습니다. 면봉을 다른 각도로 움직여 가능한 한 많은 이물질을 제거하십시오. 접점 클리너는 전자 제품에 사용하도록 특별히 설계되었지만 Joy-Con을 물에 빠뜨리지 않도록 주의하십시오. 적은 양의 클리너를 사용하십시오. 작업이 끝나면 썸스틱을 몇 번 돌려 잔류 클리너가 최대한 고르게 퍼지도록 하고 Joy-Con을 몇 분 동안 건조시킵니다.
Q-tip 보풀이 Joy-Con에 유입될 가능성이 걱정된다면 접촉 클리너를 고무층 아래에 매우 조심스럽게 직접 뿌릴 수도 있습니다. 압축 공기 캔으로 동일한 방법을 시도할 수도 있습니다.
Joy-Con을 메인 콘솔에 다시 부착하고 방법 1에서 강조 표시된 첫 번째 재보정 테스트로 돌아갑니다. 드리프트가 현저히 줄어들어 Joy-Con의 성능이 향상되었음을 알 수 있습니다. 썸스틱이 여전히 움직이면 청소 과정을 다시 반복해 보십시오. 청소가 100% 해결되지는 않지만 눈에 띄는 차이를 만듭니다.
방법 4: Joy-Con 썸스틱 교체 또는 재조립
썸스틱을 교체하는 것은 Joy-Con 드리프트를 고정하는 가장 위험한 방법이며 전자 제품에 대한 경험이 있는 경우에만 시도해야 합니다. Joy-Con을 열면 Nintendo 보증이 무효화되므로 이 옵션은 절대적인 최후의 수단입니다. 교체용 조이스틱(Venic 3D가 훌륭함)을 받고 약간의 작은 수술을 수행하는 것이 포함됩니다. 엄지스틱을 직접 교체하는 것은 권장하지 않습니다. 특히 Joy-Con의 내부 부품을 만지작거리면 더 많은 손상이 발생할 수 있습니다. 가능하다는 점을 알려드리고자 합니다.
Joy-Con 재조립의 경우 골칫거리이며 노련한 전자 제품 전문가가 아닌 이상 이 방법을 사용하면 기기에 더 많은 먼지와 이물질이 들어가는 경우가 많습니다.
방법 5: 에뮬레이터 앱 사용
Joy-Con 드리프트를 수정하기 위한 하나의 실험적 솔루션은 Bluetooth HID가 있는 Android 9 스마트폰에서 사용할 수 있습니다. Joy-Con Droid 라는 앱은 플레이어가 자신의 휴대폰을 Joy-Con 대체물로 사용할 수 있도록 합니다. 이 앱에는 스피드러너용 터보 및 TAS 설정을 에뮬레이트하는 사용자 지정 기능이 있지만 아직 알파 상태입니다.
방법 6: 무료 수리를 위해 Nintendo에 문의
다른 모든 방법이 실패할 경우 Joy-Con을 수리하는 가장 안전한 조치는 Nintento 지원 웹사이트 (새 탭에서 열림) 로 이동하여 무료 수리 또는 교체 대상인지 확인하는 것입니다. 경우에 따라 Nintendo는 유료 수리에 대해 환불을 제공합니다.
Joy-Con 드리프트가 발생하는 이유는 무엇입니까?
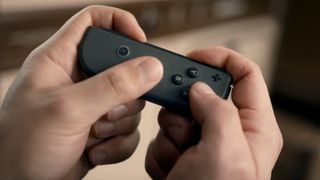
드리프트는 오른쪽보다 왼쪽 Joy-Con에 더 많은 영향을 미치는 경향이 있습니다. Joy-Con 드리프트가 발생하는 이유에 대한 명확한 설명은 없지만 메인 보드에 있는 왼쪽 Joy-Con의 안테나가 다른 금속 부품의 간섭을 받고 있다는 가설이 있습니다. 더 간단한 이유는 마모되었거나 Joy-Con의 외부 케이스에 먼지와 이물질이 침투했기 때문일 수 있습니다. Nintendo가 Joy-Con 드리프트에 대한 정보를 공식적으로 발표하기 전까지는 구체적인 답변이 없습니다.
