오디오 트윗은 Twitter의 최신 기능 중 하나이며 iPhone이 있는 경우 사용 방법을 보여드릴 수 있습니다.
현재 오디오 트윗은 iOS 사용자를 위한 제한된 테스트이므로 이 옵션이 바로 표시되지 않을 수 있습니다. 이 기능이 Android에 언제 제공될지는 알 수 없습니다.
For a long time, Twitter was a text-based service – you could even send tweets via SMS. Over the years, however, things developed and the ability to post GIFs, photos and videos gave users more flexibility. More recently, Twitter made it possible to send longer tweets, and the latest addition to the micro-blogging/social network platform is the ability to send audio tweets – or voice tweets as Twitter calls them.
At the moment, the feature is only available to iOS users, so anyone with an iPhone has a new way of expressing themselves online. They're also perfect if you have a lot to say, but don't fancy the idea of typing out huge reams of text. The idea is a simple one: you can record whatever you want to say using your phone's microphone, and it can be tweeted as an audio-only video.
By default, audio tweets are limited to 140 seconds, but don't worry if you can't cram everything you need to say into two minutes and 20 seconds. If your recording goes over the limit, Twitter will automatically split it up into a number of tweets for you. Here's how to get started with this great feature which gives you a more expressive way of saying what you want to say.
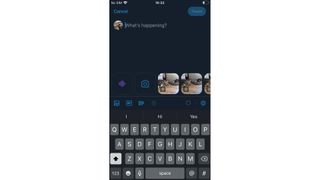
1. Access tweet recording
The first thing you will need to do is to make sure that you have the latest version of the Twitter app installed. Open up the App Store, tap the icon for your account and grab any updates that are available. Now fire up the Twitter app and tap the button in the lower right of the screen to compose a new tweet. You should see a new purple soundwave button next to the camera button and recent images – the first time it appears, it will be highlighted in the app.
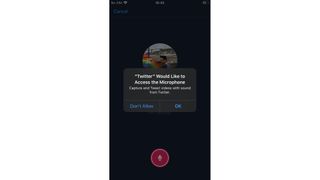
2. Record a tweet
When you tap the soundwave button, you'll be taken to new screen that shows your profile image at the top, and a red record button at the bottom. The first time you press the record button, you will have to grant the Twitter app permission to access your microphone – just hit OK – and then recording will start immediately.
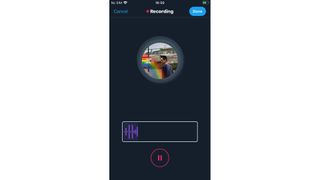
3. Pause or finish recording
Unless you have a script of what you plan to say, you may find that you want to pause recording, gather your thoughts and then continue. This isn't a problem at all: just hit the pause button that's replaced the record button. When you're ready to start recording again, just tap record once more. You will notice that as you are recording, a progress bar fills up indicating how much of the 140 seconds you have left. You will also see that as your microphone picks up your voice, shaking circles appear around your profile image as an indicator.
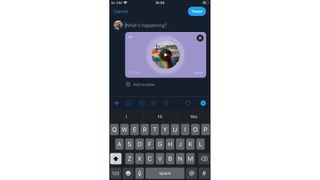
4. Preview and post audio tweets
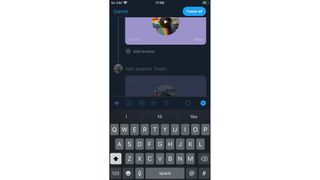
If you change your mind about a recording you're making, you can hit Cancel to the upper left at any time. But when you want to post what you have record, tap Done to the upper right and you'll be taken back to the tweet composition screen. You can preview what you've recorded by clicking the play button that's embedded in the tweet composition screen, and add introductory or explanatory text above if you like. When you're happy, hit the Tweet button
5. Record longer audio tweets
As we mentioned above, it is possible to send audio tweets that are longer than the default of 140 seconds. When you reach this 'limit' you can just keep recording and Twitter will break up your tweets into a thread. The thread can be up to 25 tweets long, meaning that you could – in theory – record up to 3,500 seconds of audio (just under an hour!) When you record longer tweets like this and tap Done to finish recording, the thread will be created automatically. Simply hit Tweet All to post them.
6. Listen to tweets
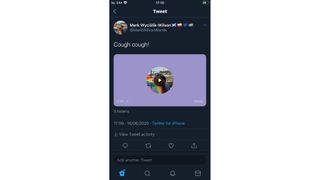
타임라인을 탐색할 때 상단에 재생 버튼이 있는 크고 평범한 색상의 배경에 중앙 프로필 이미지가 있기 때문에 오디오 트윗을 발견할 수 있습니다. 프로필 이미지는 녹화할 때와 마찬가지로 애니메이션으로 표시되며 재생은 재생 버튼을 탭하는 것만큼 간단합니다. 오디오 트윗은 iOS에서만 녹음할 수 있지만 모든 기기에서 재생할 수 있습니다.
7. 오디오 트윗에 대해 자세히 알아보기
음성 트윗에 대해 주의해야 할 몇 가지 추가 사항이 있습니다. 첫 번째는 '원본 트윗'에만 첨부할 수 있다는 것입니다. 즉, 답글에 사용할 수 없거나 무언가를 리트윗하고 댓글을 추가하는 경우에 사용할 수 없습니다. 두 번째는 프로필 사진을 변경하면 녹화 당시 가지고 있던 사진이 이미지의 이미지로 계속 사용되며 새로고침되지 않는다는 것입니다.
- 최고의 iPhone 앱 가이드를 확인하세요.
