Learning how to delete, move and resize pagefile.sys can come in super handy if storage space is running low. There's no denying that Windows 10 can be super resource intensive and sometimes the capacity provided by your physical RAM (Random Access Memory) just isn't insufficient to hold every running program and process.
While it's not anywhere near as efficient as the best RAM, Microsoft's clever paging file (known as pagefile.sys.) is a handy workaround that will hold any data that your RAM can't and prevent your system from crashing when resources are running low.
Windows 10 is configured by default to automatically manage the paging file – so you if you have the best computer or the best Windows laptop, you may not have even noticed that it's there. And that's been done for good reason - to avoid tampering.
But while it may not be easily visible, if you need to free up some space on your drive or improve system efficiency even further, you can transfer pagefile.sys to one of the best external hard drives or set a size limit.
If you're working with programs that take up a lot of processing power and you're looking to lighten the load on the working memory, pagefile.sys. is well worth considering. It's worth noting though that accessing the page file is slow and if you're moving over large quantities of data there can be a significant drop in performance.
Still, knowing how to delete, move and resize pagefile.sys can be well worth it and we walk you through everything you need to know below. Before you begin, please take the time to read our advice on deleting the file (ie: don’t) and make sure to backup your PC before you make any changes.
Is pagefile.sys safe to delete?
When it comes to how to delete, move and resize pagefile.sys, there's an important consideration to address before proceeding. Because pagefile contains important information about your PC state and running programs, deleting it could have serious consequences and tank your system’s stability. Even if it takes up a large amount of space on your drive, pagefile is absolutely necessary for the smooth operation of your computer. This is exactly why pagefile.sys is hidden by default on Windows 10.
If you choose not to heed our warning and are determined to delete pagefile.sys, follow the steps to view protected system files in Windows 10.
How to delete pagefile.sys
If you believe your pagefile.sys has become corrupted or is causing other system problems, you can choose to delete it although it is not recommended.
Follow the steps below to locate and delete the file. We'll also show you how to run a backup of your Windows 10 system in case deleting causes further issues.
1. View hidden OS Files
In order to delete pagefile.sys you first need to be able to view it.
To get started you firstly need to be able view pagefile.sys. Open the file explorer and navigate to the C: Drive.
Press Control + F1 to enable the ribbon menu. Click on 'view' and then 'Options'. A drop down menu will appear.
Click 'Change folder and search options'. In the new window which appears, click the 'view' tab and then uncheck 'Hide protected system operating files (Recommended)'.
Next, check the radio button 'Show hidden files, folders, and drives', then click 'Apply'. Pagefile.sys will now be visible.
2. Backup your files
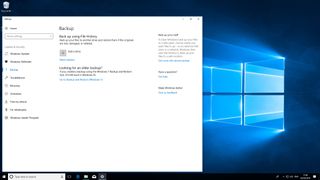
열려 있는 모든 파일을 닫고 저장합니다. 이전에 파일을 백업한 적이 없다면 Windows 10 전용 도구를 사용하여 백업할 수 있습니다. '설정' 및 >'업데이트 및 보안'에서 찾을 수 있습니다.
백업을 저장하려면 전용 외장 하드 드라이브가 필요합니다. 용량이 최소한 컴퓨터 내부의 드라이브만큼 큰지 확인하십시오.
백업을 진행할 준비가 되면 Micorosoft 웹 사이트( https://support.microsoft.com/en-ie/help/17143/windows-10-back-up-your-files (에서 열림) 의 단계를 따르십시오. 새 탭) ) 데이터를 보호합니다.
3. pagefile.sys 삭제
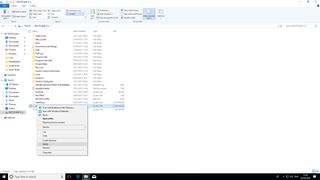
pagefile.sys를 마우스 오른쪽 버튼으로 클릭하고 '삭제'를 선택합니다. 페이지 파일이 특히 큰 경우 시스템은 파일을 휴지통으로 보내지 않고 즉시 삭제해야 할 수 있습니다. 파일이 제거되면 PC를 다시 시작하십시오.
pagefile.sys 이동하는 방법
pagefile.sys 가이드를 삭제, 이동 및 크기 조정하는 방법의 '삭제' 부분을 안내했으므로 이제 두 번째 부분인 이동을 다룰 차례입니다. 기본적으로. pagefile.sys의 크기는 약 12GB입니다. 그러나 이는 PC에서 사용하는 리소스 수와 실제 RAM의 양에 따라 달라집니다.
귀중한 하드 드라이브 공간을 절약하기 위해 pagefile.sys를 외부 드라이브로 옮길 수 있습니다. 이렇게 하면 SSD와 같은 디스크 유형과 USB 3.0을 통한 액세스 속도에 따라 시스템 속도가 빨라질 수 있습니다. 어떤 드라이브를 사용하든 더 큰 파일 크기를 처리할 수 있는 NTFS로 포맷해야 합니다.
1. 고급 설정에 액세스
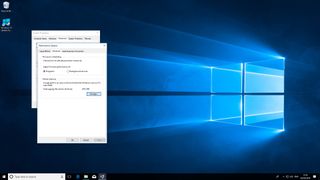
Windows 10에서 '제어판'을 엽니다. 바탕 화면 왼쪽 하단에 있는 Windows 아이콘을 선택하고 "Advanced"라는 단어를 입력합니다. 다음으로 '고급 시스템 설정 보기'를 선택합니다. '성능' 섹션에서 '설정'을 클릭합니다.
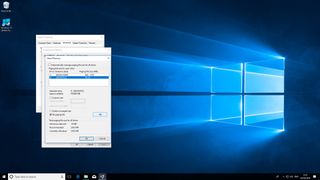
열리는 새 창에서 '고급' 탭을 클릭합니다. '가상 메모리' 섹션을 찾아 '변경'을 클릭합니다.
2. 외장 드라이브 선택
'가상 메모리' 창에서 '각 드라이브의 페이징 파일 크기 자동 관리' 옵션을 선택 취소합니다.
'시스템 관리 파일'에서 '페이징 파일 없음'을 선택합니다. 그런 다음 C 드라이브 아래에 표시되는 외장 드라이브를 선택합니다.
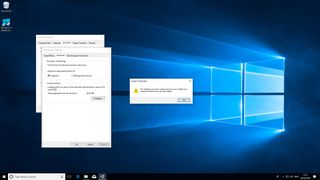
'설정' 버튼을 클릭합니다. 경고 메시지를 읽고 계속하려면 '예'를 클릭하십시오.
3. PC를 다시 시작합니다.
이러한 변경 사항을 적용하려면 시스템을 다시 시작해야 합니다. 팝업 메시지를 닫으려면 '확인'을 클릭하십시오. 열려 있는 모든 파일을 저장하고 닫은 다음 PC를 재부팅합니다.
Windows 10은 이전 pagefile.sys를 자동으로 삭제하고 외장 드라이브에 새 파일을 생성합니다.
pagefile.sys 크기를 조정하는 방법
Windows 10은 자동으로 pagefile.sys의 크기를 관리하지만 하드 드라이브 공간이 부족한 경우 제한을 둘 수 있습니다. 이로 인해 시스템 성능이 저하될 수 있습니다.
케이크를 먹고 그것을 먹는 한 가지 방법은 더 많은 RAM을 설치하는 것입니다. 즉, 시스템이 페이징 파일에 덜 의존하여 더 작아집니다. 예를 들어 Windows 10 테스트 머신에는 32GB의 RAM이 있어 페이징 파일이 2.5GB 미만이 되었습니다.
1. 메모리 사용량 확인
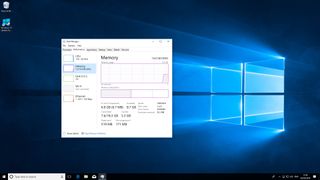
시스템에서 사용 중인 가상 메모리의 양을 확인하려면 Ctrl + Alt + Del을 눌러 '작업 관리자'에 액세스하십시오.
'성능' 탭을 클릭한 다음 '메모리'를 선택합니다. (사용 중인) 메모리 양에 세심한 주의를 기울이십시오. 이렇게 하면 pagefile.sys가 얼마나 커야 하는지 대략적으로 알 수 있습니다.
평균적으로 얼마나 많은 가상 메모리를 사용하고 있는지 알아내려면 며칠에 걸쳐 이 작업을 수행해야 합니다.
2. 고급 설정에 액세스
Windows 10에서 '제어판'을 엽니다. 바탕 화면 왼쪽 하단에 있는 Windows 아이콘을 선택하고 "Advanced"라는 단어를 입력합니다. 다음으로 '고급 시스템 설정 보기'를 선택합니다. '성능' 섹션에서 '설정'을 클릭합니다.
열리는 새 창에서 '고급' 탭을 클릭합니다. '가상 메모리' 섹션을 찾아 '변경'을 클릭합니다.
3. 크기 제한 설정
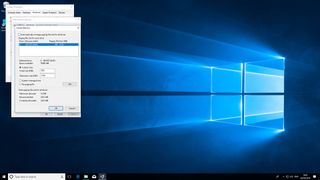
'가상 메모리' 창에서 '각 드라이브의 페이징 파일 크기 자동 관리' 옵션을 선택 취소합니다. '맞춤 크기' 옵션을 선택합니다. 파일을 '초기 크기'에서 최소 800MB로 설정합니다.
'최대 크기'에서 페이지 파일의 원하는 상한을 MB 단위로 입력합니다. 1GB = 1,024MB를 기억하십시오. 예를 들어 최대 크기 8GB는 8,192MB입니다. 변경 사항을 확인하려면 '설정'을 클릭하십시오.
이제 pagefile.sys를 삭제, 이동 및 크기 조정하기 위해 알아야 할 모든 것을 알게 되었습니다.
